Bernhard Aschenbrenner

Supervision: Univ.-Prof. Dipl.-Ing. Dr. Bernhard Zagar
This project work optimizes a high precision measurement system for the roundness of ball bearings. This measurement system was developed in the framework of a diploma thesis at the Institute for Measurement Technology, JKU Linz in collaboration with SKF Austria.
An inductive differential probe is connected to a half bridge on the printed circuit board. Two sinus voltages drive the half bridge differentially. These voltages are shifted 180 degrees each other. A precision instrumentation amplifier amplifies the bridge diagonal voltage, the signal conditioner AD698 from Analog Devices Inc. demodulates and scales the signal. Subsequently this digitized by a 18 bit analog-to-digital converter, digital processed and transmitted via a USB interface to a host PC. The output voltage of the AD698 is between ± 10V and is highly linear dependent on the probes displacement.
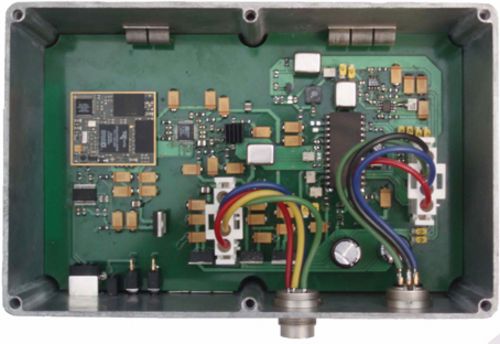
 Figure 1: Printet circuit board for the conditioning of the sensor signal
Figure 1 illustrates the already developed measurement system.
This system should detect variations in the pm-range. However, disturbances in the analog electronics produce periodic voltages in the µV range. The already existing measurement system has only a precision of ± 10nm. These disturbances are mainly generated in the signal conditioner AD698 and produce bit-losses in the analog-to-digital conversion.
The objective of this project work is to identify and to eliminate these disturbances for higher measure accuracy. A MATLAB Instrument Driver was programmed for automated measurements with the spectrum analyzer HP3585B. An RC low pass filter was developed to damp disturbing voltages in the µV range.
The low pass filter was identified with the impedance analyzer HP4194 to obtain its real Bode diagram.
The influence of the digital electronic on the measure precision was analyzed.
Febuary 04, 2009
 Go to JKU Homepage


